
Pruning
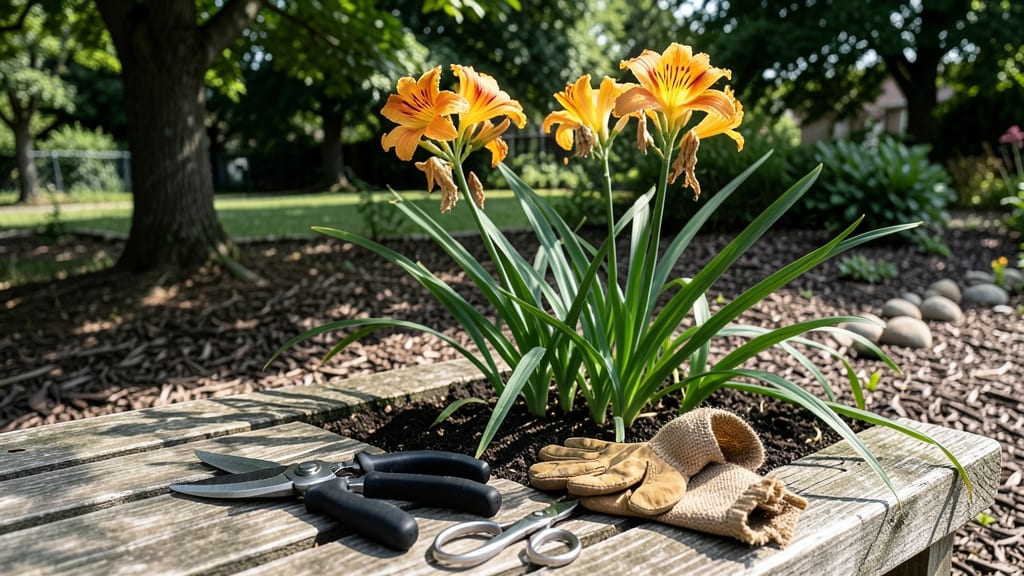
Summer pruning daylilies isn’t about cutting back hard—it’s about giving them a fresh start after blooming. ✂️ I’ve learned the hard way that pruning too early or too aggressively can stress these tough perennials, but timing it right after the flowers fade keeps them thriving for years.
The key is simple: wait until the blooms are gone, then trim just the spent stems down to the next set of leaves.
You only need a few basic tools: sharp pruners for clean cuts and a small bucket for the clippings. Most gardeners skip this step, but removing the old flower stalks prevents disease and lets the plant focus energy on new growth.
After pruning, your daylilies will bounce back with stronger foliage and even bigger blooms next season—no fancy techniques required.
The real magic happens in the regrowth. Within weeks, you’ll notice fresh green shoots pushing through, and those leaves become the plant’s energy reserve for next year’s flowers.
It’s like hitting the reset button, but without the drama. Just avoid cutting into the fan-shaped leaves at the base—they’re the plant’s food factory.
This method works for all daylily varieties, whether you’re dealing with classic yellows or modern hybrids. The best part? You can prune anytime after blooming, even in August, and still get a second wave of flowers in some cases.
Just don’t let the clippings pile up—they can harbor pests if left lying around.
📚 In This Guide
- What you need
- Instructions
- Tips and common mistakes
- Wrapping up and next steps
What you need
- ● Pruning shears or sharp bypass pruners: A pair with clean, sharp blades (4- to 6-inch blades work best). Disinfect with rubbing alcohol before and after use to prevent disease spread. ✨Pro tip: Avoid dull tools—they crush stems instead of making clean cuts!
- ● Gloves: Heavy-duty gardening gloves (waterproof or reinforced) to protect your hands from thorns and dirt.
- ● Garden kneeler or stool: For comfort, especially if your daylilies are in a large or hard-to-reach bed.
- ○ Garden twine or plant ties (optional): If you’re training vines or supporting heavy blooms, lightweight twine can help.
- ● Compost bin or bucket: A 5-gallon size to collect pruned foliage for mulch or compost.
- ● Fungicide spray: A copper-based or neem oil solution (1 tbsp per gallon of water) to treat cuts if your plants show signs of mildew.
- ● Plant food or fertilizer: A balanced 10-10-10 or slow-release granular fertilizer (1/4 cup per plant) to replenish nutrients after pruning.
- ● Watering can or hose with a gentle nozzle: To hydrate plants before and after pruning (especially in hot summer weather).
- ● Label markers (if dividing plants): Small tags or sticks to mark new divisions for future reference.
- ● Timing: Prune on a cool, overcast morning or late afternoon to avoid stressing plants in peak summer heat.
- ● Weather: Wait for 3–5 days of dry weather before pruning to prevent fungal infections from wet foliage.
- ● Plant health: Focus on healthy, established daylilies (avoid pruning stressed or newly planted ones).
Step-by-Step instructions for pruning daylilies in summer
Summer pruning keeps daylilies blooming strong—here’s how to refresh your plants without shocking them.
✂️ Step 1: Wait for Blooms to Fade Naturally
Don’t rush—wait until spent blooms turn brown and wilt on their own. Cutting flowers too soon removes energy the plant needs to store for next year’s growth. I like to wait until at least 70% of the bloom stalk has dried out, usually 2-3 weeks after flowering.
Use clean, sharp pruners to avoid tearing stems. Snip 1-2 inches above the lowest healthy leaf node—this ensures new growth can sprout from there. If you see any blackened or mushy stems, cut those back further to prevent disease from spreading.
✂️ Step 2: Remove Only the Spent Flower Stems
Here’s the thing—you’re not doing a full haircut. Only trim the leggy, leafless stalks that held the blooms. Leave the green, leafy foliage intact—this is where the plant stores nutrients for next season. I always scan for any remaining buds hiding in leaf axils before cutting.
If your daylilies are particularly vigorous, you might see secondary shoots forming after the first bloom. These can be left alone—they’ll often produce a second round of flowers later in summer. Only prune what’s truly spent.
🌱 Step 3: Thin Overcrowded Foliage for Airflow
After deadheading, check for thick clumps of leaves rubbing together. This creates humidity pockets that invite fungal diseases like leaf spot. Gently pull out or trim any weak, yellowing, or crossing stems at the base with your fingers or pruners.
Real talk: daylilies are tough, but they’ll thank you for better airflow. Aim to leave 3-5 of the strongest, healthiest fans per clump. If you’re unsure which to keep, pick the ones with the most deep green, upright leaves—these are your powerhouses.
☀️ Step 4: Water and Fertilize Lightly After Pruning
Give your daylilies a deep watering immediately after pruning to help them recover. The roots need moisture to heal, but don’t drown them—soil should feel damp 2-3 inches down but not soggy. I water in the early morning to let foliage dry before evening.
Skip heavy fertilizing now—the plant is focusing on storing energy, not new growth. Instead, sprinkle a light layer of compost around the base (but not touching the crown) to feed the roots gradually. This is the perfect time to mulch with 2-3 inches of shredded bark or straw to retain moisture and regulate soil temperature.
⏰ Step 5: Monitor for New Growth and Adjust
Within 2-3 weeks, you’ll see new shoots emerging from the base. This is your signal the pruning worked! Watch for bright green, firm leaves—these indicate healthy regrowth. If you notice any yellowing leaves, it’s usually a sign of overwatering or poor drainage.
Here’s where it gets fun—if your daylilies are happy, they might reward you with a second flush of blooms in late summer. Just keep an eye out for those tight flower buds forming at the top of the stalks. No extra pruning is needed unless those stalks get leggy again.
Tips & tricks for pruning daylilies in summer
Let’s cut to the chase—proper pruning keeps your daylilies thriving without stressing the plants. These are the game-changers I’ve learned after years of gardening (and a few too many over-pruned mishaps).
Timing is Everything: The 2-3 week wait after flowering might feel long, but it’s crucial. Cutting too soon removes the plant’s stored energy, which is like robbing Peter to pay Paul—next year’s blooms will suffer. Look for stalks that are at least 70% brown and crispy before you touch them. If you’re unsure, wait a few more days; daylilies are forgiving but not immortal.
Precision Cutting Pays Off: When you finally prune in Step 1, aim for that 1-2 inch mark above the lowest healthy leaf node. This is where new shoots will emerge, so don’t cut too low—you’ll damage the plant’s energy reserves. I use sharp pruners and make clean cuts at a 45-degree angle to prevent tearing. For blackened stems, cut back further to healthy tissue to avoid spreading disease.
Airflow is Your Secret Weapon: In Step 3, don’t just thin—strategize. Focus on removing stems that are crossing or rubbing against others. These create humidity pockets that invite fungal diseases like leaf spot. Leave 3-5 of the strongest fans per clump, prioritizing those with deep green, upright leaves. Think of it like giving your daylilies a spa day—better airflow equals happier plants.
Post-Pruning Care Makes All the Difference: That deep watering in Step 4 isn’t just about hydration—it’s about recovery. Water in the morning so foliage dries before evening, reducing disease risk. The compost and mulch aren’t just decorative; they’re feeding the roots and regulating soil temperature. Skip the heavy fertilizer now—your daylilies are in "rest and store" mode, not "grow like crazy" mode.
Pro Tips for Prune Daylilies In Summer
- Let’s cut to the chase—proper pruning keeps your daylilies thriving without stressing the plants. These are the game-...
- Timing is Everything: The 2-3 week wait after flowering might feel long, but it’s crucial. Cutting too soon removes t...
- Precision Cutting Pays Off: When you finally prune in Step 1, aim for that 1-2 inch mark above the lowest healthy lea...
Frequently asked questions
Got questions about pruning daylilies in summer? You’re not alone! Here are some of the most common concerns—and their answers—to help you prune like a pro.
Is it too late to prune daylilies if I missed spring?
Not at all! Summer pruning is actually a great way to refresh your daylilies. Focus on removing spent blooms and yellowing leaves to encourage new growth and prevent disease. Just avoid heavy pruning—stick to light trimming to avoid stressing the plant.
When is the best time to prune daylilies in summer?
The ideal window is after the first flush of blooms (usually late June or early July) and again in late summer (August-September). Prune on a cool, cloudy day to reduce stress on the plant. Avoid pruning during heatwaves or drought conditions.
Do I need to sterilize my pruners between cuts?
Sterilizing your pruners with rubbing alcohol or a 10% bleach solution prevents the spread of bacteria or fungi. Daylilies are tough, but diseases like leaf blight can still take hold if tools aren’t clean. A quick wipe between cuts keeps your garden healthy!
What if my daylilies look sad after pruning?
Don’t panic! Daylilies are resilient, but if they seem wilting or weak, they might need extra care. Water deeply after pruning, and avoid fertilizing for at least 2-3 weeks to let them recover. If leaves turn brown or mushy, it could signal rot or pest damage—inspect closely and adjust care.
Can I prune daylilies if they’re not blooming yet?
Yes, but with caution! If your daylilies haven’t bloomed yet, they’re likely still growing. Lightly trim dead or damaged foliage only—avoid cutting back more than 1/3 of the plant. This keeps energy focused on root and leaf development for future blooms.
Wrapping up and next steps
Pruning daylilies in summer isn’t just about tidying up—it’s your secret weapon for longer, healthier blooms and a stronger plant for next season! 🌿 With the right timing, tools, and technique, you’ll keep your garden vibrant while giving your daylilies the care they deserve.
Now that you’re armed with the know-how, grab those shears and get pruning! For extra confidence, watch a quick video guide or join a local gardening group to swap tips—your daylilies (and future blooms) will thank you!