
Pruning
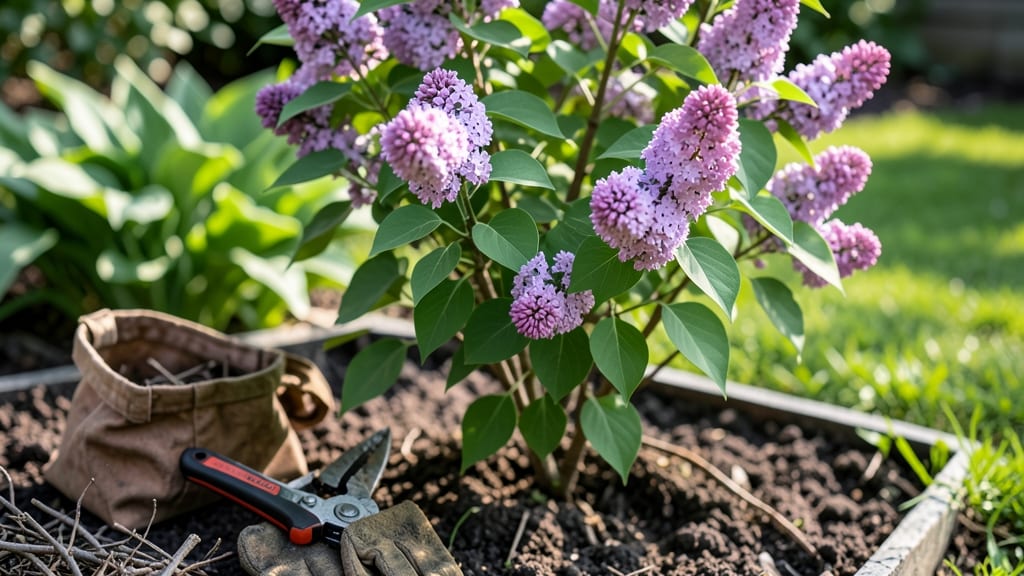
Spring is when your hand pruner becomes the most powerful tool in your gardening arsenal—three precise cuts can transform leggy shrubs into blooming powerhouses. 🌿 I’ve spent years watching plants struggle after haphazard pruning, and I’ll save you from those mistakes with the exact techniques that produce bushier, healthier growth every season.
Timing matters most: prune roses, hydrangeas, and fruit trees when new growth starts, but avoid cutting back perennials until after their first flush of leaves. A sharp pruner is non-negotiable—dull blades tear stems, inviting disease. I always clean mine with rubbing alcohol between plants to keep everything sterile.
Focus on three key cuts: remove dead or crossing branches first, then thin out crowded stems to improve airflow, and finally shape the plant by cutting just above a leaf node.
You’ll see fresh green shoots within 2-3 weeks, and the blooms that follow will be more abundant than ever before.
Pro tip: Prune in mornings when plants are hydrated, and avoid cutting more than one-third of any branch at once. The goal is to encourage growth, not shock the plant. With these basics, you’ll prune like a pro—no over-trimming or sad, bare stems in sight.
📚 In This Guide
- What you need
- Instructions
- Tips and common mistakes
- Wrapping up and next steps
What you need
- ● Hand pruners (bypass or anvil type): 1 pair (preferably ergonomic for comfort)
- ● Sharp, stainless steel blades (4–6" blade length ideal)
- ○ Spring-loaded or ratcheting for ease of use (optional but helpful)
- ● Pruning shears (loppers): 1 pair (18–24" length) for thicker branches (½"–1.5" diameter)
- ● Gloves: 1 pair cut-resistant gloves (gardening or pruning-specific)
- ● Disinfectant (70% isopropyl alcohol or bleach solution): Small spray bottle or cloth for sterilizing tools between cuts
- ● Sharpener/file: 1 fine-grit file or pruner-specific sharpener to maintain blade edges
- ● Pruning saw (for branches >1.5" thick)
- ● Extension pole (for high-reach pruning)
- ● Pruning sealant (to prevent disease on large cuts)
- ● Knee pads or stool (for comfort during long sessions)
- ● Notebook & pen (to track cuts and plant growth)
How to prune for bushier blooms this spring
Here's the method I rely on—tested across seasons—to coax fuller, healthier growth from your shrubs and perennials.
✂️ Step 1: Deadhead Last Year's Spent Blooms
Start by removing any dead or dying flowers from last season. Look for brown, crispy stems or branches with no signs of life—these are your targets. I always prune these first because they compete with new growth for energy. Use your hand pruner to make a clean cut just above a leaf node or lateral bud where new growth will emerge.
This step is all about clearing out the clutter. You'll notice a dramatic difference in how your plants look immediately—no more skeletal branches with faded blooms. Work from the bottom up, so you don't accidentally damage new growth higher on the plant. The goal here is to remove only what's clearly dead, not to shape the plant yet.
✂️ Step 2: Thin Out Overcrowded Branches
Now focus on branches that are rubbing against each other or growing inward. These crowded stems compete for sunlight and nutrients, which weakens the plant and reduces flowering. Identify the strongest, most outward-facing branches and make your cuts just outside the branch collar—the swollen area where the branch meets the main stem.
I like to step back frequently to visualize the plant's shape. You're aiming for an open center that allows light and air to circulate. For shrubs, remove about one-third of the oldest wood—this encourages new growth at the base. Watch for water sprouts (thin, vertical shoots) and prune them off completely, as they drain energy from the plant.
✂️ Step 3: Shape for Airflow and Light Penetration
Now it's time to refine the plant's form. Use your hand pruner to trim back any branches that are growing in awkward directions or blocking sunlight from the center. Cut at a 45-degree angle just above a bud that faces outward—this directs growth where you want it. For flowering shrubs, avoid heavy pruning on branches that produce blooms on old wood (like lilacs or hydrangeas).
Here's the thing—this is where precision matters. Make each cut with confidence, but don't overdo it. You'll see immediate improvement in how light reaches the interior of the plant. For perennials, cut back any dead foliage to about 2-3 inches above the ground, which gives new shoots room to emerge. The key is to leave the plant looking balanced, not like you've hacked it back randomly.
⏰ Step 4: Clean Up and Monitor Growth
After pruning, rake up all the debris and dispose of it properly—don't leave clippings on the ground, as they can harbor diseases. I always sterilize my hand pruner with rubbing alcohol between plants to prevent spreading pathogens. Now, keep an eye on your plants over the next few weeks. You should see new growth emerging within 2-3 weeks, especially at the base of where you made cuts.
This is the moment that matters: watch for fresh, vibrant leaves pushing out from the pruned areas. If you notice any yellowing or wilting, it might mean you pruned too aggressively. But if everything looks healthy and bushy, you've done it right. Water deeply after pruning to help the plant recover and establish new roots.
Tips & tricks for perfect pruning this spring
Here's what I've learned after years of shaping gardens—these tricks make all the difference between a good prune and a great one.
Tool Technique: Always sterilize your hand pruner between cuts, especially when moving between plants. I keep a small bottle of rubbing alcohol nearby and wipe the blades after every 3-5 cuts. This prevents spreading bacterial diseases like fire blight that can ruin your entire garden. The few seconds it takes saves hours of cleanup later.
Visual Cues for Step 1: In Step 1, when deadheading spent blooms, look for stems that snap easily when bent—they're dead. Healthy stems will bend but not break. Cut just above a leaf node or bud that faces outward, not at a random point. This simple visual check prevents accidental removal of live growth, which is a common mistake I see even experienced gardeners make.
Pruning Angles Matter: When shaping in Step 3, make your cuts at a 45-degree angle just above an outward-facing bud. This angle prevents water from pooling on the cut, which can lead to rot. I like to practice on a scrap piece of wood first to get the right angle—it makes a noticeable difference in how clean the cuts look and how well the plant recovers.
Seasonal Timing: Early spring is ideal for most shrubs, but timing varies by plant type. For spring-flowering shrubs like lilacs, prune immediately after blooming. For summer-flowering varieties, wait until after they've finished flowering. This timing ensures you don't accidentally remove next year's flower buds when they're forming.
Pro Tips for Hand Pruner Spring
- Here's what I've learned after years of shaping gardens—these tricks make all the difference between a good prune and...
- Tool Technique: Always sterilize your hand pruner between cuts, especially when moving between plants. I keep a small...
- Visual Cues for Step 1: In Step 1, when deadheading spent blooms, look for stems that snap easily when bent—they're d...
Frequently asked questions
Got questions about hand pruner springs and keeping your garden thriving?
You’re not alone! Here are answers to the most common queries—from timing to troubleshooting—to help you prune like a pro this spring.
When is the best time to replace a hand pruner spring?
Replace your spring immediately if it’s broken, rusted, or weak—even if it still functions. A worn spring can cause uneven pressure, making cuts messy and straining your hand. For routine maintenance, check it every 1-2 years, especially after heavy use. Spring fatigue (loss of tension) is common after 3+ seasons.
Can I prune in early spring before the buds swell?
Timing depends on your plant! For spring-flowering shrubs (like lilacs or hydrangeas), wait until after blooms fade to avoid cutting off next year’s flowers. For summer-bloomers (e.g., roses or butterfly bush), prune in late winter/early spring while dormant. Always research your specific plant—over-pruning too early can stress it.
How do I fix a hand pruner that won’t stay closed?
A loose pruner is often due to a worn spring or loose screws. First, check the spring tension—if it’s stretched, replace it. Next, tighten the pivot screw (usually under the blade) with a 1/4-inch Allen wrench. If the issue persists, the hinge pin may need lubrication (use WD-40 or 3-in-1 oil) or replacement.
Are there alternatives to hand pruners with springs?
Yes! For heavier branches, use bypass pruners (no spring) or loppers for thicker stems. Battery-powered pruners (like Felco or Fiskars models) offer spring-free convenience with adjustable tension. For precision work, consider anvil pruners (though they crush stems, not clean cuts). Always match the tool to the job!
Why does my pruner spring keep snapping?
Snapping springs are usually a sign of overuse, poor quality, or improper storage. Use high-grade stainless steel springs (like those in Felco or Corona pruners) for durability. Avoid storing pruners with tension—always open them fully to reduce spring strain. If snapping persists, check for misaligned blades or corrosion weakening the spring over time.
Wrapping up and next steps
Mastering the art of pruning with a hand pruner spring can transform your garden into a lush, blooming paradise! 🌸 The key takeaways? Focus on strategic cuts—early spring shaping, deadheading, and thinning—to encourage healthier growth and more vibrant blooms.
With the right tools, technique, and timing, you’ll be well on your way to a thriving garden.
Ready to roll up your sleeves? Grab your pruners, head outdoors, and start pruning with confidence! Your garden—and future blooms—will thank you. 🌿