
Pruning
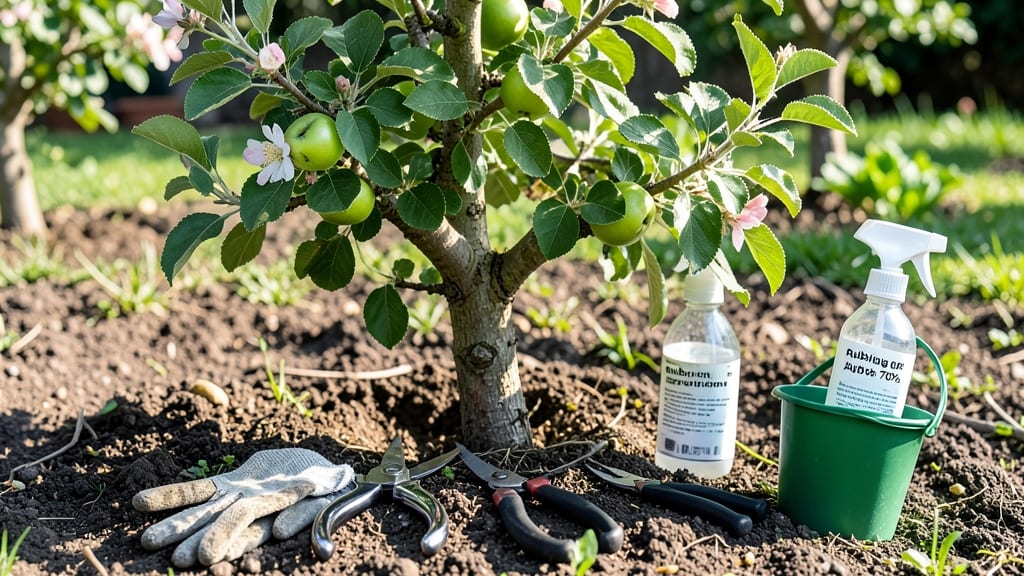
Pruning a small apple tree transforms it from a tangled mess into a fruit-bearing masterpiece. ✂️ I’ve spent years watching my backyard tree go from scraggly to producing bushels of apples—all thanks to a few strategic cuts at the right time.
The secret isn’t complicated: it’s about opening the tree’s canopy to sunlight and air, which means bigger fruit and fewer pests.
You’ll need just three tools: sharp pruning shears, loppers for thicker branches, and a pair of gloves. Timing matters most—prune in late winter or early spring while the tree is dormant, but avoid heavy cuts in summer unless removing deadwood.
Start by removing any dead, diseased, or crossing branches first; these are the easiest cuts and make the rest of the job simpler.
After shaping the tree, you’ll notice new growth within weeks—thicker branches, more sunlight reaching the center, and fewer apples falling prematurely. The key is to thin out branches so air circulates, which prevents fungal diseases and helps fruit develop properly.
By summer, your tree will look like a well-kept secret garden, and by next harvest season, you’ll be picking apples that are larger and sweeter than ever.
This method works for young trees or mature ones needing a refresh, and it keeps the tree healthy for decades. The payoff? A tree that’s easier to maintain, produces more fruit, and looks stunning year-round. Ready to grab your shears and get started?
📚 In This Guide
- What you need
- Instructions
- Tips and common mistakes
- Wrapping up and next steps
What you need
- ● Pruning shears: Bypass pruners (for cuts up to ½ inch thick) – 1 pair. Look for sharp, stainless steel blades (e.g., Fiskars or Felco brands).
- ● Loppers: Bypass-style (for branches ½ to 2 inches thick) – 1 pair. Opt for long handles (20+ inches) for leverage.
- ● Pruning saw: Curved-tooth (for branches 2+ inches thick) – 1 saw. Avoid cheap models; Bahco or Gonicc are reliable.
- ● Disinfectant: 70% isopropyl alcohol or bleach solution (1 part bleach to 9 parts water) – small spray bottle. Sanitize tools between cuts to prevent disease.
- ● Rubbing alcohol or hand sanitizer: 1 bottle. Keep your hands clean while working.
- ● Garden twine or zip ties: 1 roll. Use to secure larger branches temporarily if needed.
- ● Gloves: Heavy-duty gardening gloves – 1 pair. Protect your hands from thorns and sap.
- ● Ladder or sturdy stool: 1 unit. Only if your tree is taller than 6 feet—prioritize safety!
- ● Pole pruner: Extendable (for high branches) – 1 unit. Saves your back!
- ● Tree wound dressing: Pruning sealant (controversial, but some swear by it) – Use sparingly if at all.
- ● Notebook & pencil: 1 each. Sketch your tree’s structure before/after pruning for reference.
- ● Water spray bottle: 1 small bottle. Dampen cuts to reduce sap splatter.
Step-by-Step instructions for pruning a small apple tree
Here's the simple, science-backed method I use to keep my young apple trees healthy, productive, and easy to manage.
✂️ Step 1: Prune in Late Winter Before Bud Break
Timing is everything—wait until late winter when the tree is still dormant but just before buds begin to swell (usually February-March in most climates). This ensures you're not removing next year's fruit buds by accident. I always prune on a dry, sunny day because wet branches are harder to cut cleanly and sap flows more.
Start by removing dead, diseased, or crossing branches first. These are your top priorities because they either block light/airflow or invite pests. Look for branches that rub against each other—they'll eventually tear open wounds. Cut these back to the trunk or a healthy lateral branch using clean, sharp pruning shears.
🌿 Step 2: Establish an Open Center Shape
The goal is to create a vase-like shape with an open center that lets sunlight and air reach the core. For a small tree, aim for 3-5 main scaffold branches spaced 12-18 inches apart along the trunk. These branches should emerge at 45-degree angles—anything steeper will grow weak over time.
If you see suckers (shoots growing straight up from the trunk) or water sprouts (thin, fast-growing vertical branches), cut them off completely. These compete with fruit-bearing branches for energy. For thicker branches over ½ inch, use pruning saws to make clean cuts just outside the branch collar (the swollen area where the branch meets the trunk).
☀️ Step 3: Thin Out Overlapping Branches
Now focus on thinning rather than just cutting back. Remove 25-30% of the tree's total branches to improve airflow and fruit quality. Look for branches that grow directly inward or block sunlight from reaching the center. These are the ones to remove entirely—don't just trim them back, because stubs invite disease.
Pay special attention to fruit clusters. If you see too many small fruit buds in one spot, thin them out now to prevent overcrowding. A good rule is to leave only 1-2 strong buds per spur (the short, stubby branches where apples form). This ensures larger, healthier fruit next season. Use your fingers to gently twist off excess buds—they'll snap cleanly at the base.
⏰ Step 4: Light Summer Pruning After Harvest
About 6-8 weeks after harvest, do a quick maintenance prune to remove any dead wood, broken branches, or suckers that popped up during the growing season. This keeps the tree tidy and prevents pests from hiding in damaged areas. Avoid heavy pruning now—you don't want to stress the tree as it prepares for winter.
If you notice new growth that's too vigorous (long, thin shoots with small leaves), you can lightly trim the tips to encourage bushier growth. Just pinch off the top ¼ inch of these shoots with your fingers. This redirects energy to thicker, fruit-bearing branches. Water the base of the tree deeply after pruning to help it recover.
✂️ Step 5: Clean Up and Sterilize Tools
After pruning, sterilize your tools with rubbing alcohol or a 10% bleach solution to prevent spreading disease between cuts. Wipe down shears and saws thoroughly before storing them. I also like to collect and dispose of pruned branches immediately—don't leave them piled under the tree, as they can harbor pests and fungi.
Finally, mulch the base of the tree with 2-3 inches of organic mulch (like wood chips) to retain moisture and suppress weeds. Keep the mulch 6 inches away from the trunk to prevent rot. This is the last step, but it's crucial—healthy soil means healthier fruit next year.
Tips & tricks for pruning a small apple tree
Here's what nobody tells you about pruning—these little details make all the difference between a healthy tree and one that struggles to bear fruit.
Timing is Everything: The February-March window in Step 1 is critical because that's when the tree is still dormant but just waking up. If you prune too early, you risk removing next year's fruit buds by accident. I've learned this the hard way—once I pruned in January and ended up with fewer apples the following season. Watch for those tiny bud swells to appear before you start cutting.
Branch Angle Matters: In Step 2, when shaping your tree, pay close attention to those 45-degree angles for your scaffold branches. Branches growing straight up or too steeply will eventually break under the weight of fruit. I use a small protractor tool to check angles—it's worth the investment. Also, make sure your main branches are spaced 12-18 inches apart along the trunk to prevent crowding.
Thinning vs. Trimming: Step 3 emphasizes thinning rather than just cutting back branches. The key is to remove entire branches that grow inward or block sunlight—never leave stubs. I remember making this mistake early on and ended up with more disease problems. When thinning fruit clusters, leave only 1-2 strong buds per spur. This might seem counterintuitive, but it leads to larger, healthier apples next year.
Tool Care Saves Trees: After finishing Step 5, I can't stress enough how important it is to sterilize your tools between cuts. I keep a small spray bottle of rubbing alcohol in my tool bag and wipe down shears after every 2-3 cuts. This simple step prevents spreading disease from one branch to another. Also, always collect and dispose of pruned branches immediately—they can harbor pests and fungi if left piled under the tree.
Pro Tips for Prune A Small Apple Tree
- Here's what nobody tells you about pruning—these little details make all the difference between a healthy tree and on...
- Timing is Everything: The February-March window in Step 1 is critical because that's when the tree is still dormant b...
- Branch Angle Matters: In Step 2, when shaping your tree, pay close attention to those 45-degree angles for your scaff...
Frequently asked questions
Got questions about pruning your small apple tree?
You’re not alone! Here are answers to the most common concerns—so you can prune with confidence and keep that tree thriving.
When is the best time to prune an apple tree?
The ideal times are late winter (just before buds swell) or early spring. Summer pruning (after harvest) is also safe if needed, but avoid heavy cuts in fall—it can encourage disease. Pro tip: If your tree is young (<3 years), prioritize shaping in winter.
How much can I cut off my apple tree in one session?
Never remove more than 25% of the tree’s branches in a single pruning. For small trees, this might mean just a few branches. Over-pruning stresses the tree and reduces fruit production. Focus on gradual shaping over 2–3 years for best results.
What if my cuts bleed or ooze sap?
Sap bleeding (especially in early spring) is normal! It won’t harm the tree, but you can seal larger cuts with pruning sealant if concerned. Smaller cuts (under ½ inch) don’t need sealing—they’ll heal naturally. Pro tip: Use sharp tools to minimize tearing.
Can I prune an apple tree without shears?
Yes! For small branches, use hand pruners or bypass shears. Thicker branches may need a pruning saw. Avoid loppers for small trees—they can damage bark. If you’re hesitant, start with just dead or crossing branches and upgrade tools later.
Why does my apple tree have so many suckers?
Suckers (shoots growing from the base or roots) steal energy from fruit production. Remove them completely at the base—even if they’re small. They won’t turn into strong branches, and pruning them early saves you work later. Pro tip: Mulch properly to reduce future suckers!
Do I need to sterilize my pruning tools?
Absolutely!
Clean tools between cuts with rubbing alcohol or a 10% bleach solution to prevent spreading disease (like fire blight). Wipe blades dry before storing. Pro tip: Sharpen tools yearly for cleaner cuts and less stress on the tree.
Wrapping up and next steps
Pruning your small apple tree doesn’t have to be intimidating—it’s all about timing, technique, and a little patience! 🌳 With the right tools, a clear plan, and seasonal care, you’ll shape a thriving tree that rewards you with bold harvests for years.
Remember, every cut is a step toward healthier growth and bigger fruit.
Now that you’re armed with the know-how, take action! Grab your pruners, mark those branches, and give your tree the TLC it deserves. Happy pruning—and here’s to next year’s juiciest apples! 🍏✨