
Pruning
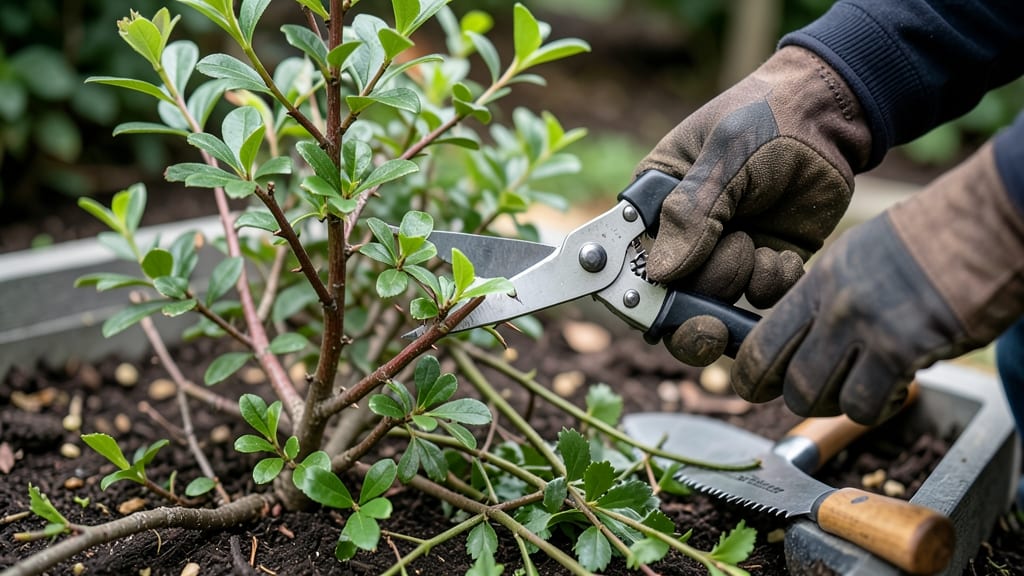
Pruning barberry in late winter reveals the plant’s hidden potential—stronger canes, better blooms, and a shape that actually looks intentional. 🌿 I’ve spent years watching barberries turn from scraggly to showstopping with just a few cuts, and the dormant season is the perfect time to work your magic.
The goal is simple: remove dead wood, thin crowded branches, and encourage new growth from the base. You’ll need sharp pruners, a clean cutting surface, and about 30 minutes for a medium-sized shrub.
The key is cutting just above a healthy bud, never into old wood—this keeps the plant vigorous and prevents disease. By spring, you’ll see fresh green shoots pushing from the base, and those old, woody stems will give way to a fuller, more productive plant.
Airflow improves, pests have fewer hiding spots, and the berries (if you’re growing fruiting varieties) become more abundant. Works for both ornamental and fruiting barberries, and the same principles apply whether you’re shaping a hedge or a standalone specimen. Let’s get those canes looking their best!
📚 In This Guide
- What you need
- Instructions
- Tips and common mistakes
- Wrapping up and next steps
What you need
- ● Pruning shears (bypass or anvil type): Sharp, clean blades (sterilize with rubbing alcohol before use to prevent disease spread).
- ● Size: 6-8 inches for small to medium canes.
- ● Loppers: For thicker stems (½–1½ inches in diameter).
- ● Bypass-type preferred for cleaner cuts.
- ● Pruning saw: For very thick canes (over 1½ inches).
- ● Curved or straight blade—your choice!
- ● Gloves: Heavy-duty, cut-resistant (barberry thorns are no joke!).
- ○ Optional: Garden gloves with grip for extra comfort.
- ● Disinfectant (rubbing alcohol or 10% bleach solution): To clean tools between cuts.
- ● Trash bags or bucket: For collecting pruned branches.
- ○ Marking twine or flags: (Optional but helpful for identifying canes to remove before cutting.)
- ● Hand pruners with a ratchet mechanism: Reduces hand fatigue for large jobs.
- ● Knee pads or stool: If your barberry is tall or the ground is uneven.
- ● Spray bottle with water: To dampen dust when cutting (keeps debris down!).
- ● Pruning sealant: For large wounds (controversial—only use if your barberry is highly susceptible to disease).
Step-by-step guide to pruning barberry in dormant season
Here's how I transform barberry bushes into denser, healthier plants every winter—no guesswork, just proven techniques.
✂️ Step 1: Assess the Bush and Gather Tools
Start by examining your barberry in late winter or early spring before new growth begins. Look for dead, diseased, or crossing canes—these are the first to go. I like to work on a dry day when the plant is fully dormant, making it easier to spot weak growth. Grab your sharp pruning shears (cleaned with rubbing alcohol) and gloves—barberries have thorns that pack a punch.
Stand back and scan the plant for overcrowded areas where canes grow too close together. These compete for sunlight and nutrients, weakening the bush. Mark these spots with a small flag or mental note before you begin cutting. The goal is to open up the center for better airflow and light penetration, which prevents fungal issues.
✂️ Step 2: Remove Dead, Diseased, and Weak Growth
Begin by cutting out any dead or diseased canes at the base. These are easy to spot—they’re brown, brittle, or devoid of leaves. Snip them off cleanly at a 45-degree angle just above a healthy bud or lateral branch. This prevents water from pooling on the cut and reduces the risk of rot.
Next, tackle weak or spindly growth—these are the thin canes that stretch outward but never thicken. Cut these back to a strong lateral branch or bud. I always make my cuts just above a bud facing outward to encourage the plant to grow in a more open, rounded shape. Avoid leaving stubs; a clean cut heals faster and looks better.
✂️ Step 3: Thin Out Crossing and Overcrowded Canes
Now focus on crossing canes—these rub against each other, creating wounds that invite disease. Choose the weaker of the two canes and cut it out completely at the base. If both are strong, remove the one growing inward or downward. This might seem harsh, but it’s what gives barberries their signature compact, bushy form over time.
For overcrowded areas, aim to space canes about 6-12 inches apart, depending on the variety. If your barberry is mature, you might need to remove up to one-third of the canes to improve airflow. Step back frequently to check your progress—you’ll notice the bush starting to look more open and structured.
✂️ Step 4: Shape the Bush for Balance and Airflow
Now it’s time to refine the shape. Barberries thrive when they’re rounded and full, not flat or top-heavy. Start by cutting back long, leggy branches to a strong lateral bud. For every cut, imagine the plant’s final shape—aim for a natural, balanced silhouette that lets light reach the center.
If your barberry has overly dense areas, selectively thin out smaller branches to open it up. Avoid cutting more than one-third of the plant’s total growth in a single season—this can stress the bush. Once you’re happy with the shape, step back and admire your work. The bush should look lighter, airier, and ready for spring growth.
✂️ Step 5: Clean Up and Monitor for New Growth
After pruning, sterilize your tools again with rubbing alcohol to prevent spreading disease. Collect all clippings and dispose of them in a sealed bag—never compost diseased material. Give the base of the plant a light mulch layer (if using) to protect it from late frosts and retain moisture.
Watch for new growth in early spring—this is your reward for a job well done. Healthy barberries will respond with vibrant green shoots and a bushier form. If you notice any yellowing leaves or stunted growth after pruning, it might mean you cut too aggressively. Next time, hold back a little more.
Tips & tricks for perfect barberry pruning
Real talk: Pruning barberry might seem intimidating, but these small details make all the difference between a bush that thrives and one that struggles. Here's what nobody tells you—
Timing is Everything: Late winter to early spring is your window—prune when the plant is fully dormant but before buds swell. This timing prevents stressing the plant too early in the season. I've learned the hard way that pruning too late can encourage new growth that gets damaged by late frosts. Look for days when temperatures stay above freezing to avoid shock.
The Angle Matters: When cutting back canes in Step 2, that 45-degree angle isn't just for looks—it prevents water from pooling on the cut. I always make sure to cut just above a healthy outward-facing bud. This creates a natural shield that protects the cut from moisture and encourages new growth in the right direction. Use a clean cut, not a jagged one, to minimize damage.
Visual Cues for Better Cuts: In Step 3, when thinning crossing canes, imagine you're creating a dome shape. The goal is to see light through the center of the bush when you step back. I hold my pruners at a 45-degree angle and cut just above the bud that faces outward. This creates that signature rounded shape barberries are known for while improving airflow through the plant.
Tool Maintenance: You'll notice I mention sterilizing tools twice in the instructions—that's no accident. After every few cuts, especially when dealing with diseased material, wipe your pruners with rubbing alcohol. I keep a small bottle in my tool pouch. Clean tools prevent spreading fungal spores between cuts and keep your barberry healthy. Don't skip this step, even if the plant looks fine.
Pro Tips for Barberry Plant Pruning
- Real talk: Pruning barberry might seem intimidating, but these small details make all the difference between a bush t...
- Timing is Everything: Late winter to early spring is your window—prune when the plant is fully dormant but before bud...
- The Angle Matters: When cutting back canes in Step 2, that 45-degree angle isn't just for looks—it prevents water fro...
Frequently asked questions
Got questions about pruning your barberry? You’re not alone! Here are some of the most common concerns—and their straightforward answers—to help you prune like a pro this dormant season.
When is the best time to prune barberry plants?
The ideal window is late winter or early spring, just before new growth begins (typically February–March in most climates). Pruning during dormancy minimizes stress and disease risk. Avoid pruning in fall—it can leave cuts vulnerable to winter damage.
How much can I trim back my barberry?
Barberries are tough! You can safely remove up to one-third of the plant’s oldest canes each year to encourage new growth. For overgrown shrubs, thin out crowded stems at the base to improve airflow. Pro tip: Never cut more than 20% in a single season to avoid shocking the plant.
What if my barberry has dead or diseased branches?
Remove any branches that are mushy, discolored, or devoid of leaves—cut them back to healthy wood. Sterilize your pruners with rubbing alcohol between cuts to prevent spreading pathogens. If fungal issues persist, consider a fungicide labeled for ornamental shrubs.
Can I prune barberry for hedges or topiary shapes?
Barberries respond well to formal shaping when pruned multiple times per year (light trims in spring/summer). Use sharp shears for clean cuts and water frequently after pruning to reduce stress. For hedges, aim for a rounded top to encourage bushiness.
What if I missed the dormant season window?
Don’t panic! Light pruning in early summer (after flowering) is better than none. Avoid heavy cuts—focus on removing only dead wood or wayward branches. Just be prepared for slightly slower recovery compared to winter pruning.
Still unsure? Snap a photo of your barberry’s growth habit and compare it to pruning guides—most issues are easier to spot in person!
Wrapping up and next steps
Mastering barberry plant pruning during dormancy is your secret weapon for lush, vigorous growth and bountiful berries! 🌿 By following this blueprint—timing, techniques, and tool prep—you’ll keep your shrubs healthy, pest-resistant, and full of energy for spring.
Now that you’re armed with the know-how, roll up your sleeves and give your barberries the care they deserve. Ready to transform your garden? Start by grabbing your pruners and scheduling that first trim—your future berry harvest will thank you!