
Pruning
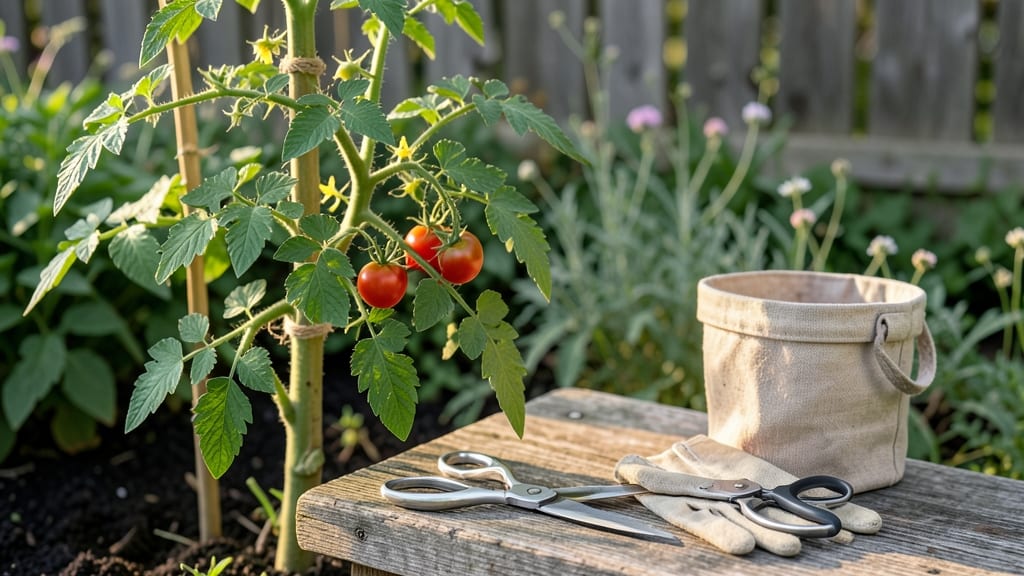
Watch this video of pruning tomato plants to see how a few simple cuts transform a scraggly vine into a fruit-loaded powerhouse—more tomatoes in less space. 🌱 I learned this the hard way after my first garden produced just three sad tomatoes on a tangled mess of branches.
The right cuts direct energy where it matters: to fruit, not foliage. You’ll need sharp pruners, a clean workspace, and 10 minutes on a sunny morning. Start by removing suckers—the little shoots that grow between the main stem and branches—when they’re pencil-sized. These steal nutrients from your actual tomatoes.
For indeterminate varieties, prune the lower leaves to improve airflow and reduce disease. By mid-season, your plants will look like well-groomed shrubs instead of wild vines. The result? 20-30% more tomatoes, all ripening faster. Even my black thumb can’t mess this up once you get the hang of it.
Pro tip: Save your pruned branches—compost them or use them as mulch. And never prune more than one-third of the plant at once, or you’ll shock the roots. Let’s get those vines shaped!
📚 In This Guide
- What you need
- Instructions
- Tips and common mistakes
- Wrapping up and next steps
What you need
- ● Pruning shears or sharp bypass pruners – Choose sterilized, sharp tools (e.g., Felco F-2 or Corona bypass pruners) to avoid damaging plants or spreading disease. Size: 5-7 inches for precision.
- ● Gloves – Wear gardening gloves (nitrile or leather) to protect your hands from thorns and dirt.
- ● Disinfectant solution – Mix 1 part bleach to 9 parts water or use rubbing alcohol (70%+) to sterilize tools between cuts.
- ● Tomato plants – Healthy, established plants (4-6 weeks old) with 3-5 main stems for indeterminate varieties or fully developed bushes for determinate types.
- ○ Support structure (optional but recommended) – Cages, stakes, or trellises (e.g., 6-foot wooden stakes or spiral tomato cages) to guide growth post-pruning.
- ● Garden twine – For securing vines to stakes or trellises (10-15 feet per plant).
- ● Mulch (straw or shredded leaves) – To retain moisture and protect soil after pruning.
- ○ Plant growth regulator (optional) – Products like seaweed extract or paclobutrazol to control excessive growth (follow label instructions).
- ● Camera or smartphone – To capture your pruning progress or reference a video tutorial side-by-side!
Step-by-Step pruning for bushier tomato plants
Here’s how to prune tomatoes like a pro—no fancy tools needed, just sharp eyes and a few minutes each week.
🌿 Step 1: Understand Your Tomato Type
First, know your plant: indeterminate tomatoes grow continuously (prune heavily) while determinate ones bush out and stop (prune lightly). Look for the plant tag or check the seed packet—this makes all the difference. Indeterminate varieties like ‘Sungold’ or ‘Beefsteak’ need aggressive pruning to focus energy on fruit, while determinate types like ‘Roma’ or ‘Celebrity’ produce all at once and don’t need much trimming.
If you’re unsure, watch the plant’s growth pattern: indeterminate vines keep climbing, while determinate ones stop at a certain height. Pruning the wrong type can stress the plant or reduce yields. I always start by snapping a quick photo of my plants before I begin—it helps me remember what I’ve already trimmed.
✂️ Step 2: Remove the Suckers
Suckers are the small shoots that grow in the V-shaped junction between the main stem and a branch. These little stems steal energy from your fruit. Use your fingers or clean pruners to pinch them off early in the morning when the plant is turgid (full of water)—this makes them easier to remove without damaging the plant.
Start checking for suckers when the plant reaches 12-18 inches tall. I like to do this every 5-7 days during peak growing season. If you miss a sucker, don’t stress—just remove it as soon as you spot it. The goal is to keep the plant’s energy flowing upward and into fruit production, not into extra foliage.
☀️ Step 3: Trim Lower Leaves for Airflow
Remove any leaves that touch the soil or hang below the first fruit cluster. These leaves trap moisture, inviting disease like blight. Use clean pruners to cut just above a leaf node (the bump where leaves grow). I aim to keep the plant’s center open like a sunny window—this lets air circulate and light reach the lower fruit.
Don’t overdo it: leave enough leaves to shade developing fruit from sunburn. A good rule is to remove no more than 20% of the foliage at once. If your plant looks stressed after pruning, you’ve gone too far. The goal is balance—more airflow, but not so much that the plant can’t photosynthesize.
🌱 Step 4: Maintain the Main Stem
For indeterminate tomatoes, leave 1-2 strong main stems (called leaders) to grow upward. If a leader gets damaged or weak, prune it back to the next strong lateral branch. This keeps the plant’s structure sturdy and encourages upward growth. I tie my main stems to stakes or a trellis as they grow—this prevents them from flopping and snapping.
If you’re growing determinate tomatoes, let them bush naturally. These plants produce all their fruit at once, so pruning is minimal. Just remove diseased or yellowing leaves to keep energy flowing. The key here is observation: if your plant looks healthy and productive, hands off!
⏰ Step 5: Prune for Fruit Production
Once your plant is 4-5 feet tall, focus on removing leaves above the top fruit cluster. This directs the plant’s energy into ripening existing fruit instead of growing more foliage. I like to leave 2-3 leaves above each cluster to support the fruit’s weight and provide some shade.
Stop pruning 4-6 weeks before your first frost. This gives the plant time to harden off and ripen any remaining fruit. If you prune too late, new growth won’t mature before cold weather sets in. Watch your local frost dates and adjust your pruning schedule accordingly—this is where many gardeners go wrong.
Tips & tricks for perfect tomato plant pruning
Took me years of trial and error to figure out these game-changing tricks that'll transform your tomato harvest.
Timing Secret: Early morning is the absolute best time to prune—between 6 and 9 AM when the plant is still turgid with water. This makes suckers easier to remove and reduces stress on the plant. I've learned this the hard way after watching plants wilt from midday pruning. The cooler temperatures also mean less water loss through the freshly cut stems.
Tool Technique: Clean, sharp pruners are non-negotiable. I sterilize mine with rubbing alcohol between plants to prevent disease spread. For suckers, I actually prefer using my fingers—it gives me more control and prevents accidental damage to the main stem. Just pinch at the base where the sucker meets the main stem, and it should come off cleanly with a slight twist.
Visual Cues: When pruning for fruit production (Step 5), look for the "fruit zone"—the area between the last flower cluster and the top of the plant. This is where you'll focus your pruning. I like to leave 2-3 leaves above each fruit cluster to create a natural canopy that protects the fruit from sunburn while still allowing airflow. Think of it as creating little umbrellas for your tomatoes.
Observation Strategy: Keep a simple pruning log—just mark the date and what you removed. I use a small notebook tucked into my gardening apron. This helps me track growth patterns and remember which branches I've already addressed. For indeterminate plants, I mark the height at each pruning session to monitor vertical growth progress.
Pro Tips for Video Of Pruning Tomato Plants
- Took me years of trial and error to figure out these game-changing tricks that'll transform your tomato harvest.
- Timing Secret: Early morning is the absolute best time to prune—between 6 and 9 AM when the plant is still turgid wit...
- Tool Technique: Clean, sharp pruners are non-negotiable. I sterilize mine with rubbing alcohol between plants to prev...
Frequently asked questions
Got questions about pruning tomato plants?
You’re not alone! Here are some frequently asked questions to help you master the technique and grow healthier, more productive tomato plants.
When is the best time to prune tomato plants?
Prune your tomato plants early and often—start when they’re about 12 inches tall and continue every 1-2 weeks. For indeterminate varieties (like cherry tomatoes), prune throughout the growing season to encourage bushier growth. Determinate tomatoes (bush types) need minimal pruning—just remove suckers to improve airflow. Timing tip: Avoid pruning too late in the season, as it can stress plants before harvest.
What if I don’t prune my tomato plants?
You can skip pruning, but expect fewer fruits and more disease risk. Without pruning, plants grow tall and leggy, with poor airflow that invites blight, mold, and pests. Pruning boosts yields by directing energy to fruit production and reducing competition for nutrients. Pro tip: If you’re short on time, focus on removing lower leaves (within 6-12 inches of the ground) to prevent soil-borne diseases.
How do I prune tomato plants without killing them?
Prune with care! Use clean, sharp pruners to avoid tearing stems. Cut just above a leaf node (the bump where leaves grow) to encourage new growth. Avoid over-pruning—never remove more than 1/3 of the plant at once. For sensitive varieties, pinch suckers by hand instead of cutting to minimize stress. Signs of over-pruning: Yellowing leaves or stunted growth.
Can I prune tomato plants in the video if I don’t have pruning shears?
Use clean scissors, garden snips, or even your fingernails (for small suckers). If you’re really DIY-ing, twist off suckers gently by hand—just be patient. Safety first: Sterilize tools with rubbing alcohol to prevent spreading disease. Bonus hack: Repurpose old kitchen scissors (dedicated to gardening only!) for quick pruning.
What should I do with the pruned tomato plant parts?
Don’t toss those clippings! Compost them (unless diseased) to recycle nutrients back into your garden. If parts show signs of blight or pests, bag and dispose of them in the trash. Pro move: Use healthy prunings as mulch around the base of plants to retain moisture.
How do I know if I’m pruning correctly?
You’re on the right track if your plant has:
- 3-4 main stems (for indeterminate varieties) with strong leaf nodes.
- No more than 6-8 leaves per stem (older leaves should be gone).
- Healthy green leaves (no yellowing or wilting).
- Fruits forming at the lower nodes (not just at the top).
Wrapping up and next steps
Pruning your tomato plants isn’t just about keeping them tidy—it’s your secret weapon for bigger, healthier harvests! 🌱 By following the steps in this guide, you’ll encourage stronger growth, better airflow, and more fruit.
Whether you’re a beginner or a seasoned gardener, every snip brings you closer to a bountiful tomato season.
Ready to put your new skills into action? Grab your pruners, head to your garden, and watch those plants thrive! For extra inspiration, check out a video of pruning tomato plants to see the process in motion—then get growing! 🍅✨