
Pruning
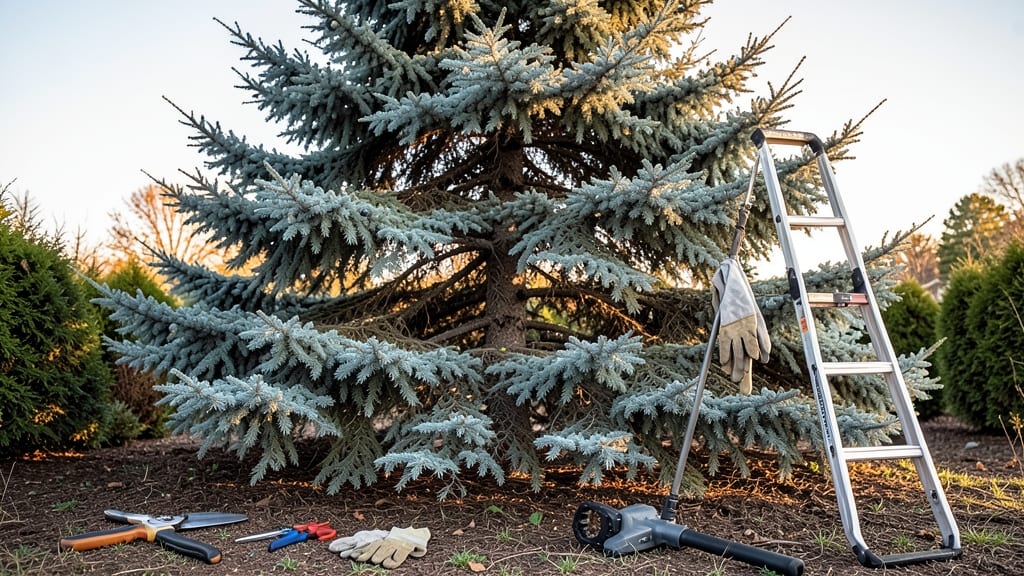
Pruning cedar shrubs in late winter reveals their hidden structure—when branches look like skeletal fingers reaching for sunlight. ✂️ I learned the hard way that timing matters: pruning too early risks frost damage, while waiting too long lets pests move in.
The dormant season is your window to shape these evergreens without stressing them, and the results—thicker growth, fewer brown patches—are worth the effort.
You’ll need sharp bypass pruners, a ladder for taller shrubs, and a clear day to work. Focus on removing dead or crossing branches first, then thin out crowded areas to improve airflow.
Cedar shrubs handle pruning well, but they don’t like harsh cuts—always make clean slices just above a healthy bud or branch collar. A 10% annual prune keeps them looking natural while preventing disease buildup.
What you’ll end up with is a shrub that looks fuller, grows stronger, and resists pests like bagworms. The key is patience: cedars don’t respond to aggressive pruning like some shrubs, so take it slow.
By spring, you’ll notice new growth filling in gaps and a healthier overall shape. The best part? Less maintenance down the road.
This method works for all cedar varieties—Alberta spruce, Eastern redcedar, or even dwarf types. Just adjust the scale: smaller shrubs need less drastic cuts, while mature ones can handle more structural work. Start small, observe how your cedar responds, and refine your approach each year.
📚 In This Guide
- What you need
- Instructions
- Tips and common mistakes
- Wrapping up and next steps
What you need
- ● Gearing up for pruning your cedar shrubs? Here’s everything you’ll need to tackle the job safely and efficiently—whether you’re a seasoned gardener or just starting out! 🌿✂️
Step-by-Step guide to pruning cedar shrubs during dormancy
Here's how I transform overgrown cedars into healthy, bushy shrubs—without stressing the plant.
✂️ Step 1: Assess the Shrub and Plan Your Cuts
Start by examining the cedar from all sides. I look for dead branches first—these are the easiest to spot because they're brown, brittle, and often crisscross the shrub like skeletal fingers. Use your fingers to gently test each branch for stiffness; live branches should bend slightly before snapping.
Next, identify any branches growing inward or rubbing against others. These are candidates for removal because they'll compete for sunlight and nutrients, creating weak spots. I sketch a quick mental map of where I'll cut, focusing on opening up the center for better airflow and light penetration. Never remove more than one-third of the shrub's total foliage in a single season—cedars are tough, but they won't bounce back from drastic pruning.
✂️ Step 2: Sterilize Tools and Make Clean Cuts
Before you touch the first branch, wipe your pruning shears and saw with rubbing alcohol or a 10% bleach solution (1 part bleach to 9 parts water). This prevents spreading diseases like cedar blight between cuts. I also sharpen my tools with a file to ensure clean cuts that heal faster.
When pruning, always cut just outside the branch collar—the swollen area where the branch meets the trunk. This ensures the wound seals properly. For branches thicker than ½ inch, use a pruning saw to avoid tearing the bark. Make the cut at a 45-degree angle about ¼ inch from the branch collar, then follow with a second cut parallel to the branch to prevent bark from peeling off.
✂️ Step 3: Remove Dead and Problem Branches First
Start with the dead branches—these are the easiest to remove and won't stress the shrub. Cut them back to the branch collar, then dispose of them immediately. I never leave dead wood lying around because it can harbor pests or diseases that might infect healthy branches.
Next, tackle the inward-growing or crossing branches. Cut these back to their point of origin, making sure your cuts are flush with the branch collar. If a branch is too large to remove entirely, thin it out by cutting smaller branches along its length. This opens up the center of the shrub while maintaining its natural shape. Watch for new growth at the base of the cuts—this signals the shrub is responding well to pruning.
✂️ Step 4: Shape the Shrub for Balance and Airflow
Now it's time to refine the shape. Step back frequently to check your progress—cedars grow densely, so you want to maintain a full, rounded silhouette. I focus on creating an open center by selectively thinning branches from the inside out. This prevents the classic "cedar donut" look where the center stays bare while the outside grows wild.
For larger shrubs, I work in sections, starting at the bottom and moving upward. This helps me visualize the final shape and ensures I don't miss any branches. Avoid cutting more than 20% of the shrub's foliage in one session—cedars are slow to recover from heavy pruning. If you're unsure, err on the side of caution and leave some branches for next year.
⏰ Step 5: Clean Up and Monitor Recovery
After pruning, rake up all the debris and dispose of it in the trash—not the compost pile. Cedar clippings can harbor diseases that might reinfect your shrub. I also give the base of the shrub a quick check for any remaining dead branches or signs of pests like spider mites or scale insects.
Water the shrub deeply after pruning to help it recover, especially if the weather is dry. Cedar shrubs are drought-tolerant, but they still need moisture to heal pruning wounds. Over the next few weeks, keep an eye out for new growth at the tips of remaining branches—that's your sign the pruning was successful. If you notice yellowing leaves or wilting, it might mean you pruned too aggressively or the shrub is stressed from drought.
Tips & tricks for pruning cedar shrubs like a pro
Real talk: I've seen too many cedars end up looking like sad, overcrowded hedges after pruning. Here's what actually works to keep them thriving.
Branch Testing Trick: In Step 1, when you're assessing branches, don't just look—touch! Live cedar branches should bend slightly before snapping (like a fresh carrot), while dead ones will crumble like stale crackers. I learned this the hard way after removing what I thought were "thin" branches that turned out to be perfectly healthy growth.
Tool Sterilization Secret: For Step 2, I keep a small spray bottle with my 10% bleach solution handy between shrubs. The key is to let it air dry completely before making cuts—wet tools can spread disease even when sterilized. Also, I always sterilize my tools between different shrubs in the same yard, not just between yards.
Shape Maintenance Hack: When shaping in Step 4, I use a simple trick: step back every 5-10 minutes and hold your hands up like you're framing a picture. Your fingers should just touch the outer edges of the shrub when it's properly shaped. This prevents that "cedar donut" look where the center stays bare while the outside grows wild.
Pro Tips for Pruning Cedar Shrubs
- Real talk: I've seen too many cedars end up looking like sad, overcrowded hedges after pruning. Here's what actually ...
- Branch Testing Trick: In Step 1, when you're assessing branches, don't just look—touch! Live cedar branches should be...
- Tool Sterilization Secret: For Step 2, I keep a small spray bottle with my 10% bleach solution handy between shrubs. ...
Frequently asked questions
Got questions about pruning cedar shrubs?
You’re not alone! Here are answers to the most common concerns—from timing to tools—to help you tackle the job like a pro.
When is the best time to prune cedar shrubs?
Prune cedars during late winter or early spring (dormant season), ideally before new growth starts. This minimizes stress and reduces pest/disease risks. Avoid pruning in fall—it can leave shrubs vulnerable to winter damage. For heavily overgrown cedars, light pruning in stages over 2–3 years works best!
Do I need special tools to prune cedars?
Basic tools suffice! Use sharp bypass pruners for small branches and loppers or a handsaw for thicker stems. A pruning saw or pole saw helps with tall/overhead branches. Disinfect tools between cuts to prevent spreading disease. No fancy gear? A sturdy ladder and patience will do!
How much can I trim without harming the shrub?
Never remove more than 25–30% of the foliage in one season—cedars are sensitive to over-pruning. For shaping, focus on thinning out crowded branches to improve airflow. Heavy pruning (e.g., shearing) can stress cedars, leading to weak growth or dieback. Less is more!
What should I do if my cedar looks sad after pruning?
If your cedar appears leggy, sparse, or brown post-pruning, it’s likely over-pruned or stressed. Water deeply and avoid fertilizing—cedars prefer lean soil. For severe cases, mulch lightly and wait until next dormant season to prune only dead/diseased branches. Patience helps—cedars recover slowly!
Can I shape cedars like boxwoods with shears?
While cedars can be shaped, avoid heavy shearing—it removes protective bark and invites pests. Instead, use selective pruning to refine form. For formal hedges, prune lightly every 2–3 years and never cut into old wood. Tip: Hand-pruning creates a natural, healthier look than power tools!
How often should I prune mature cedar trees?
Mature cedars need minimal pruning—just remove dead/diseased branches annually and thin out 10–15% of growth every 3–5 years. Over-pruning weakens them. Focus on health, not aesthetics: Cedars thrive with open canopies and good airflow to prevent fungal issues.
Wrapping up and next steps
Pruning your cedar shrubs during the dormant season is a game-changer for their long-term health and beauty! 🌿 By following this blueprint—choosing the right tools, timing, and techniques—you’ll encourage lush, dense growth while keeping pests at bay. Remember, patience and precision pay off, so don’t rush the process.
Ready to transform your landscape? Grab your pruners, mark your calendar for late winter or early spring, and get started! Your cedars will thank you with vibrant, thriving foliage all season long.